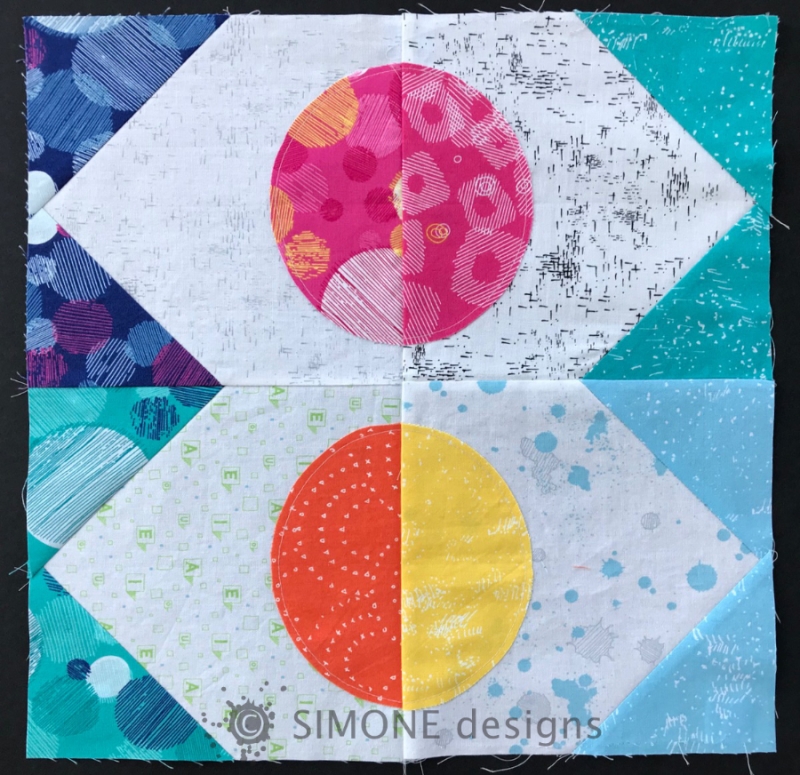
Wonky House Tutorial
Block measures 12.5″ square
Seam allowances are 1/4″ but don’t need to be perfect
Press seams to the side that is darker
I suggest you read through all the steps first before beginning
You will need at least four prints for the house, roof, door and windows (more for additional windows, chimney, etc.), a background fabric and a green print for the grass.
I find it extremely helpful to mark off the finished block size on my cutting mat with painter’s tape. This helps to keep proportions accurate and ensures you don’t cut anything too small!!
BEFORE YOU START CUTTING, REMEMBER – CUT YOUR PIECES BIGGER THAN THEY NEED TO BE AND THEN TRIM THEM TO SIZE. YOU CAN ALWAYS TRIM DOWN, BUT YOU CAN’T ADD FABRIC BACK!!
Looking at the final block picture above, you will see that it is basically three sections – the base, the house body and the roof. Begin by cutting the base 13″ long and at least 4″ wide.
For the house body, it is easier to cut the door and window first and then “fill in” the area around them with the house pieces. They can be trimmed and adjusted as you go, but you don’t want a door or window that is too small or too big so I start with them. I like to cut the roof triangle now so I can “see” how it is going to come together.

These measurements are a good starting point, yours may be different. I like to start with straight edges and I trim them at angles later.
Now cut the house pieces. Using the picture as a guide, cut a piece for below the window, between the door and the window, the right side, the left side, and the top. Remember to cut them too big and trim as you go.
The numbers indicate the order to sew them together.

To make it wonky, trim the angled edges as you go.

To make your angled edges match before sewing, cut one piece to the desired angle, and then use a clear ruler to cut the second piece. In the picture below, I first cut the blue door piece at an angle. Then I placed the red piece next to it – straight. I placed a line on my ruler along the cut edge (the 3/4″ here, but it doesn’t matter). Then I cut the red piece.
I did this on both sides of the door. Doing it this way keeps everything on the straight of grain which prevents distortion.

I used the same method to angle the window.

After sewing pieces 1 – 6 together, trim the top edge and bottom edges. They can be straight or angled.

Sew on the top piece.

Trim the sides and do it wonky!!

Cut two rectangles out of the background fabric.. Mine are 4″ x 8″, but you will want them to be at least an inch bigger than the finished background area.

Using a clear ruler, cut the angle to match the sides of the house in the same manner
as you did the door and window.

Sew the two side pieces to the house body and trim the top and bottom edges even with the house.
It is looking pretty cute, right? I know you are dying to see how it looks sitting on the green grass, so go ahead and sew that to the bottom edge. First cut the angled edge on the green rectangle to match the angled edge on the bottom of the house. You should be pretty good at that by now!!
Notice that the block is extending beyond the blue tape – that is good! You will trim it up nice and square when it is all done.
Test the roof triangle to make sure you are happy with the fit now that the house is done. If you want the roof to extend beyond the sides of the house, keep in mind that you’ll lose about 1/2″ in seam allowances. Trim it smaller if you need to. If it turns out that it is too small, toss it in the scrap bin and cut another one.
This is my foolproof method of making sure the roof and background fit together nicely.

Cut a rectangle at least 1 inch bigger on all sides than the finished piece will be.
Place the roof piece on top of it in the exact location of the finished roof.
Line up your ruler with the edge of the roof and cut through both thicknesses.
(oops – the sun was coming through the window!!)
Put the underneath piece of background fabric in the scrap bin.
Sew the roof piece to the right background piece and then the left

background piece. Don’t worry about the seam allowances or the edges not lining up – the piece will be trimmed down.
(If you want to add a chimney first, cut one of the background pieces in half where you want the chimney to go. Piece the chimney with the background fabric and sew into place.)

Trim the lower edge and sew it to the house section.

Using a 12.5″ square ruler, trim the block to size. If you don’t have a 12.5″ ruler, I recommend you get one! It is the one ruler I couldn’t live without!!
TA DA!!
I hope this all made sense and was easy to follow.
If you have any questions, please leave me a comment and I will be happy to help you!
If you’d like a PDF printable file, you can find one here.
You must be logged in to post a comment.